You bought an extended warranty for one reason: you did not want a major RV repair to turn into a major bill. Then something stops working. Maybe your refrigerator will not cool before a weekend trip. Your slide-out gets stuck halfway. The air conditioner quits during a Sacramento summer. Or you notice an electrical problem but have no idea where it is coming from. This is usually when the questions start.
- Do you call the warranty company first?
- Can you choose your own repair shop?
- Who pays for diagnostics?
And can the technician simply fix the problem and deal with the warranty paperwork later? Usually, it’s not that simple. An RV extended warranty repair usually follows a specific claim process. Understanding that process before you bring your RV in can save you a lot of frustration. So, this blog walks you through the entire warranty repair process, step by step.
What Happens During an RV Extended Warranty Repair?
From spotting the problem to getting your RV back, here’s what you can expect at each stage.
Step 1: You Notice Something Is Wrong With Your RV
The process starts with the actual problem. Try to write down everything you have noticed before taking your RV in. Be specific instead of simply saying, “The fridge is broken.” For example:
- The refrigerator runs but does not stay cold.
- The slide-out moves a few inches and stops.
- The water heater works on propane but not electricity.
- The air conditioner turns on but blows warm air.
- You hear an unusual noise when operating the leveling system.
This information gives the technician a clear starting point, which helps the shop document and explain the issue accurately when submitting your claim.
| Schedule Your RV Repair – Call 916-929-3510 |
Step 2: The Repair Shop Diagnoses the Problem
Your warranty company cannot approve a repair simply because something does not work. Someone first needs to determine why it failed. That means your RV goes through diagnostic testing.
- The technician may inspect the affected component, test the system, trace wiring, check connections, or operate the appliance. In some cases, parts may need to be removed to find the cause of the failure.
- Suppose your RV air conditioner stops cooling. The warranty company needs more than “AC does not work.” It may need to know which component failed, what caused the failure, what parts are required, and how much labor the repair will take.
This level of detail matters because the warranty provider usually needs more than a general description of the problem.
If you have been searching for RV repair in Sacramento, look for a shop that is comfortable handling both the mechanical work and the warranty process.
Step 3: Your Warranty Coverage Is Checked
Finding the problem does not automatically mean the warranty will pay for it. Your repair facility or warranty provider needs to check the terms of your contract. Depending on the plan, extended warranties may cover specified mechanical or electrical failures.
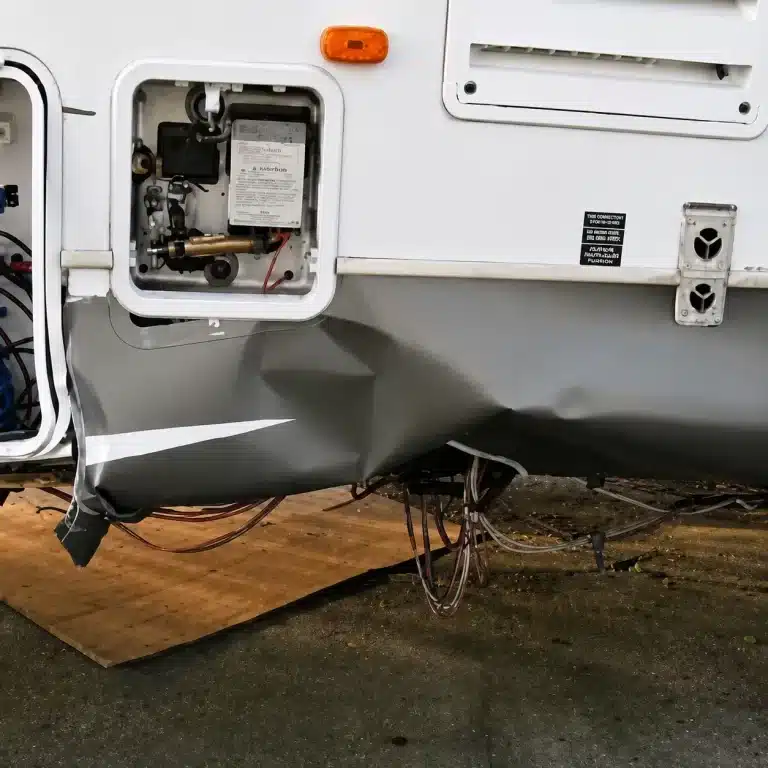
They usually do not work like collision insurance. Physical damage caused by accidents, weather, impacts, or similar events may fall outside extended warranty coverage. Coverage can also vary significantly between plans. Depending on your plan, coverage may include –
- Appliances
- Electrical components
- Plumbing systems
- HVAC components
- Slide-out mechanisms
- Leveling systems
- Mechanical components
It may also contain exclusions, deductibles, coverage limits, or maintenance requirements. This is why two RV owners with the same failed component can receive different claim decisions.
Step 4: The Repair Shop Sends the Claim for Authorization
This is one of the most important parts of the process. In many cases, the repair should not begin before the warranty company authorizes it.
- The shop usually gives the warranty provider information about the failure, required repair, parts, labor, and estimated cost. Typically, the warranty administrator must approve the repair before major work begins. Check your contract or ask the repair shop about the approval requirements before authorizing repairs.
- Sometimes approval is straightforward. Other times, the warranty company may request additional information, photos, maintenance records, or further diagnostic work.
A shop experienced with warranty claims can make this part much easier.
Step 5: The Warranty Company Approves, Partially Approves, or Denies the Claim
After the warranty company reviews the claim, you will usually get one of three outcomes.
- Approved: The covered repair can move forward according to your contract.
- Partially approved: The company agrees to pay for some of the repair but not everything. You may have a deductible or costs related to excluded parts, labor differences, or diagnostic work.
- Denied: The company decides that the failure is excluded under the contract. A denial doesn’t always mean the component itself is excluded. A claim can also be denied because of the cause of the failure, even if the component itself is normally covered.
For instance, a covered mechanical component damaged as a result of a non-covered event could produce a different outcome than that same component failing on its own. That’s why accurate diagnosis and documentation are so important.
Step 6: You Approve Any Costs That Fall to You
“Covered by warranty” does not necessarily mean “completely free.” Before work starts, ask what you might need to pay out of pocket. Depending on your contract, you may also be responsible for –
- Your deductible
- Non-covered diagnostic charges
- Maintenance-related work
- Excluded components
- Costs above the plan’s approved amount
A reputable Sacramento trailer repair shop should help you understand what has been authorized before moving ahead. You should not have to pick up your RV and discover a bill you were never expecting.
Step 7: The Approved RV Repair Is Completed
After authorization, the technician can begin the approved work. Depending on the problem, that could mean –
- Repairing or replacing an appliance
- Correcting an electrical issue
- Working on a roof system
- Repairing suspension components
- Addressing another covered failure
If you need RV repair in Sacramento, CA, working with a shop that understands warranty claims can be especially helpful. Warranty repairs involve more than turning wrenches. The shop must document the problem, follow specific submission requirements, and handle all communication with the provider.
Step 8: The Repair Is Checked Before You Get Your RV Back
Replacing the failed part is not quite the end of the repair process. The repaired system should be tested to make sure it works correctly.
- For example, if your slide-out was repaired, it should operate properly before delivery. If the refrigerator needs work, its operation should be checked. If an electrical component fails, the technician may need to verify the system after repair.
- This final check can prevent you from towing your RV home only to discover the original problem is still there.
Then you can get back to what you bought your RV for in the first place – actually using it.
Read More About
- Worn Kingpin vs. Worn Hitch: How to Tell Which One Is Actually Causing Your Towing Problems
- Why Won’t My 5th Wheel Hitch Lock? The Most Dangerous Hitch Problem Explained
- What Causes a RV Refrigerator Cooling Unit to Fail?
What Can Cause an RV Extended Warranty Claim to Be Denied?
One of the easiest ways to run into warranty trouble is to assume that every breakdown is covered. It’s not. Your contract determines coverage. But common problems can include damage caused by accidents or weather, excluded components, and failures connected to inadequate maintenance. Maintenance deserves special attention.
Some extended warranty contracts require you to follow the manufacturer’s recommended maintenance schedule and keep records of that work. Keep receipts and service records for your trailer maintenance, as they may become important if your warranty provider asks for proof.
How Can You Make Your RV Warranty Repair Go More Smoothly?
A little preparation can make the process much easier.
- Keep Your Warranty Details Ready: Before bringing your RV in, find your warranty contract and have your policy information available. Write down every problem you want inspected. Bring relevant maintenance records, and explain when the problem started and what you noticed.
- Wait for Approval Before Repairs: Most importantly, do not authorize major warranty-related repairs before the required approval has been obtained.
- Choose a Shop With Warranty Experience: When looking for “trailer repair near me” or “trailer service near me,” consider more than how close the shop is. Ask if they regularly work with extended warranty companies. An experienced RV trailer repair facility can help with diagnosis, documentation, authorization, communication, and the repair itself.
These simple steps can help keep your warranty claim and repair moving in the right direction.
| Start Your Warranty Repair – Call 916-929-3510 |
What RV Owners Should Know About Warranty Repairs
1. How long does an RV extended warranty repair take?
There is no standard timeline. The repair may take longer if the warranty company requests additional documentation, an inspection, or further diagnosis. Parts availability can also affect the schedule. When opting for an RV repair Sacramento service, ask the shop what could affect the estimated turnaround time.
2. What should I bring when taking my RV in for warranty work?
Bring your extended warranty contract or policy information, maintenance records, and any documents related to previous repairs. You should also make a list of the problems you have noticed. Having this information ready can help the repair shop document your concerns and communicate with the warranty provider more efficiently.
3. Can I get warranty work done on an older RV?
Possibly. The age of your RV does not automatically determine if an existing extended warranty claim will be covered. Your contract, the failed component, the cause of the problem, and the terms of your coverage matter. For RV repair, bring your warranty information so the shop can review the claim requirements.
Takeaway
RV warranty work can get confusing, especially when you are already dealing with something that has gone wrong with your RV. Start by writing down the problem, keeping your warranty and maintenance records nearby, and waiting for warranty authorization before any work begins.
Also, take a few minutes to go over your coverage. Find out what you will need to pay and what the warranty company will handle. And when you choose a repair shop, look for one that has dealt with warranty claims before. It can save you from a lot of unnecessary back-and-forth.
Get Extended Warranty or RV Repair in Sacramento With McColloch’s RV Repair & Storage
You already have enough to think about when your RV breaks down. Chasing warranty companies and figuring out claim paperwork should not make the experience harder.
McColloch’s RV Repair & Storage has served the Sacramento area for more than 30 years and is family-owned and operated. Our shop works with leading extended warranty providers, handles the warranty paperwork, and provides services such as RV repairs in Sacramento for most makes and models of fifth wheels and travel trailers.
So, if you need trailer repair in Sacramento, CA, or support with an extended warranty claim, our team can help you work through the process and get your RV back on the road. Call us at 916-929-3510.